Spool Knitting
This project is rated: MODERATE
Materials needed:
- Spool, or other wooden item with a hole
- Yarn
- Crochet Hook (a #2 is a good size)
- Yarn Needle
- Brads, up to 6
- Hammer
Make a spool knitter to form long, fat, cords that can be used to create various knitted projects. This project describes how to make a knitting spool and how to use it. Alternatively, you can purchase a spool knitter machine, sometimes called a weaver, from a craft store. If you purchase one, you may skip the steps that describe making the spool knitter.
Project Instructions
- Using brads that are 1/2 or 3/4 inches in length, hammer them into the spool equally spaced around the hole. You may choose to use 4, or 5, or 6. For this example I used 6. The image at right shows a top view of a completed spool. You are now ready to start knitting!
- Select a yarn (knitting worsted is appropriate) in any color of your choice. Pass the yarn through the spool (from top to bottom) so that several inches hang out the bottom of the spool. Then wrap the yarn around all the brads on the top of the spool as shown in the second image at right.
- Place the yarn on the outside of the first brad. Using a crochet hook, reach under the yarn, hook the loop of yarn on the first brad, and then pull the loop out, up, and over the brad. Do this at each brad. This is called “casting on.”
- Again, place the yarn on the outside of the first brad, and pull the previous loop out, up, and over the brad. Do this at each brad. After each turn, pull the yarn downward to move the knitted cord through the spool. The third image at right illustrates how the top of the spool will look after doing several turns around the spool. You continue this process making your cord as long as you desire.
Those are the rudiments for making your spool and knitting on it. Now I will discribe different variations.
Variations
How many brads to use? The number will determine the “fatness” of the finished cord. The initial example used 6 brads. However, an odd number has an advantage in casting on. In the example above, on the first turn, the yarn was wrapped around each brad. If you have an odd number of brads, say 5, wrap the yarn so it goes outside of brad #1, then go inside brad #2, then outside brad #3, then inside brad #4, then outside brad #5, then inside brad #1, then outside brad #2, then inside brad #3, then outside brad #4, then inside brad #5. You now have made 2 turns around the brads, but you have created a loop at each brad which is easier to hook when you start knitting. The image at right is this method. Note that you have created a loop that is easier to catch with your crochet hook.
You can change colors as you knit. Cut the yarn of one color and tie to it a yarn of a different color. Continue knitting. Be sure that the knot is positioned so that it goes inside of the cord.
The following image shows a short piece of cord that has been knitted with white yarn.

You can omit a brad to make part of your knitting thinner. Below is an image of a piece that has been knit; first by knitting as described; then the loops on two brads has been looped over a single brad and knitting continued using one less brad.

When you finish your cord, you must tie off the end so it will not unravel. Cut the yarn about 6 inches beyond the end of your knitting. Put a yarn needle on the end of the yarn; then pass the end of the yarn through the loop at each brad. You may now pull the cord off of the brads. Pulling the end of the cord will tie all the loops together.
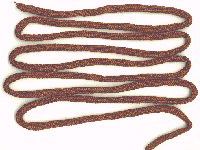
You can buy a spool knitting machine. With such a machine, you can make large quantities of cord quickly. However, you do not have the flexibility that you have with the methods described above. The image at right shows a length of cord made on this type of machine.
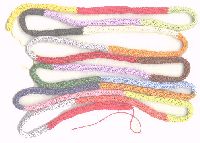
The image at right shows a multi-colored length made using the methods described in this project using a regular thread spool.
How do you use your finished knitting? You can make hot pads, hats, belts, bags, place mats, etc. Some of these projects require making a long piece(s) of cord. The simplest project is the hot pad, as seen in the image at the top of this project. You coil the cord and sew adjacent loops together.
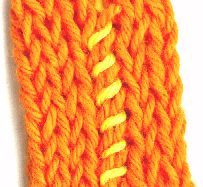
The image at right shows how you sew adjacent loops together. You may want to use the same color yarn as used for the cord. In the image, a contrasting color was used for visibility.
How do you determine how much cord to make for your project? Lay a piece of your cord on a table and flatten it. Then measure its width. Determine the area you need for the project. Divide this area by the width of your cord; the result will be the length you need. For example, suppose that you want to make a hot pad with a diameter of 8 inches. If your flattened cord has a width of 3/8 inches. The area needed is about 1.57 times the diameter (8″) giving 12.56 square inches. Dividing this by .375 (3/8″) gives about 33.5 inches.


