Rocking Horse
This project is rated: DIFFICULT
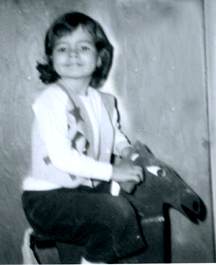
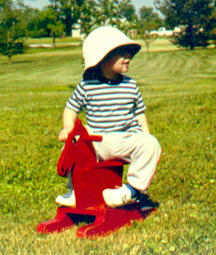
In this project, you will make a child’s rocking horse. The size of the horse is suitable for children up to 2 or 3 years of age. The completed horse will be similar to the one shown at right.
Materials needed:
- Wood – 3/4″ plywood,
one 2″ by 4″, and
one 2″ by 8″ - Dowel rod – 1″ by 7″ for handhold
- Computer paper or card stock
- Glue
- Jigsaw and saw
- Drill with drill bits
- Screws – 4 at 1.5″
- Two 8″ long, 3/8″ carriage bolts,
two 3/8″ lock washers, and
two 3/8″ nuts - Nails or dowel for pins
- Paint or stain
- Yarn for tail
- Scrap carpet or vinyl for treads
Template Instructions
The patterns for the head, seat, and rockers (shown at right) have been designed to be printed on 8.5″ by 11″ sheets of paper or card stock.
The head is given in 2 pieces. Print the upper part of the head and then print the lower part of the head. Cut out each pattern piece and tape the two pieces together to form the template for the head.
The seat pattern only gives one-half of the seat. Print 2 half-seat patterns, cut out each, turn one over, and tape it to the other piece to make a complete seat template.
The pattern for the rockers is one-half of a rocker. Print two copies of the rocker pattern, cut out each, turn one over, and tape it to the other piece to form a complete template for one rocker. It will be used twice.
Project Instructions
- Use the head template to layout the head on a 3/4″ thick piece of plywood. Cut out the head using a jigsaw, and drill a one inch hole where shown on the template.
- Use the seat template to layout the seat on 3/4″ thick plywood. Cut out the seat using a jigsaw.
- Use the rocker template to layout two rockers on 2″ by 4″ wood. Cut out both rockers using a jigsaw.
- Cut the body of the horse from a piece of 2″ by 8″ wood using a saw. Its dimensions are shown in the diagram at right. There is no pattern supplied.
- Cut the foot rest from a piece of 3/4″ plywood that is 9 inches wide and 10 inches long using a saw. There is no pattern supplied.
-
Cut a 7 inch long handhold from the 1 inch dowel.
Sand all pieces before assembling.
Assembly Instructions
- Fasten the foot rest to the two rockers using 4 flat head #10 screws that are 1 1/2″ long.
- Counterbore the seat at the locations marked on the template so that the diameter and depth will accommodate the heads of the carriage bolts.
- Drill 3/8″ inch holes through the seat, body, and foot rest.
- Assemble the seat to the body and then the body and seat to the foot rest using the long carriage bolts, lock washers, and nuts.
- Center the handhold in the head through the 1″ hole. The handhold is pinned in place by using a finishing nail, or small dowel. Drill a suitably sized hole from the top of the head down into the handhold. Place your choice of pin in this hole so that it is flush with the top of the horse’s head.
- The body is to have a slot mortised into the top of the body as shown in the diagram at right. This mortise is centered on the body, 3/4″ wide, 1.125″ deep, and 5″ long. Place the horse’s head into this mortise with glue. For added strength, the head can be pinned by driving two #4 finishing nails through the body and head near the front and back of the mortise.
-
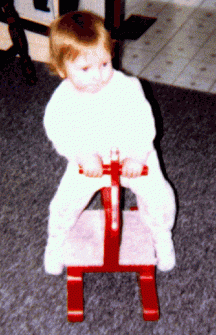
Once assembled, you can paint the rocking horse any color that you desire, I suggest 2 coats of enamel type paint. Alternatively, you could stain your horse, but that will depend on the quality of wood you used. The pictures of the completed project show a red painted horse (top of the page) and a clear varnished horse (below these instructions.)
-
After the finish is dry, the mouth, nostrils, eyes, and mane may be added using colors that you desire.
-
To be complete, the horse needs a tail. Braid a tail from suitably colored yarn, and fasten it to the rear center of the seat with a small screw.
Also, you may add carpet or textured vinyl treads to the foot rest areas.
I hope your child and others get as much enjoyment from the rocking horse as our children, grandchildren, nieces and nephews, and others have gotten from the red horse which I originally made in 1963.


