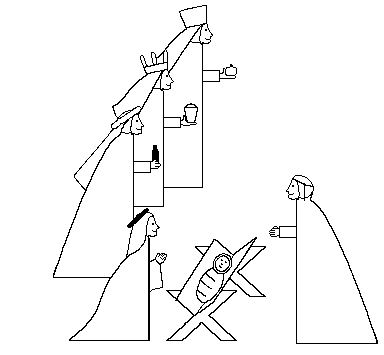
Nativity Scene
Make an entire Nativity Scene of stand-up paper figures, including Mary, Joseph, and baby Jesus, with three Kings bearing gifts.
This project is rated: MODERATE
Materials needed:
- Computer paper or card stock
- Crayons, colored pencils, or paint
- Scissors or craft knife
- glue or paste
Project Instructions
- There are six figures to be printed, each will fill an entire page. Once printed, repeat the following steps for each figure.
- Carefully fold each paper along the dotted line so that when the paper is folded, the images are on the outside and are perfectly aligned, back to back, with each other. (On the manger page, first cut off the bottom part of the page, with the baby and manger, before folding.)
- Open the paper and apply a small amount of glue (or paste) to the back of the images on one side of the fold. Re-fold the paper and press the sides firmly together. Allow the glue to dry.
- Color, or paint, your figures if you are choosing to do so.
- Cut out the figures, be mindful of the glue tabs on the ‘stand’ portion of the figures.
- Mary, Joseph, and the Kings:
- Fold the tab on the ‘stand’ pieces. Run your thumbnail firmly over the fold to get a good crease.
- Open the tab out and apply glue to one side.
- Fold the tab again, and attach it to the front edge of the corresponding figure. The tab should be between the two pieces. You can choose either side of the figure to attach the stand. Which side you choose is not important, but you may want to plan how you are going to arrange the figures and choose accordingly. Press the two pieces together so that you get a good bond. When the glue is dry, the figure may be made to stand by spreading the two pieces apart.
- The instructions for the manger are slightly different:
- Each crossbuck has two tabs outlined with dotted lines. Cut around the tabs and separate the tabs by cutting along the vertical dotted line.
- Fold the tabs down to form a right angle with the crossbuck.
- The manger is a rectangle with a dotted line down the center. Cut out the rectangle and then fold it along the center dotted line.
- Apply glue to the tabs on each crossbuck. (You may find it easier to apply the glue to the bottom of the inside piece.) Then glue the manger to the crossbucks, such that it forms a cradle for the babe. You can position the cross bucks to suit yourself so that the manger will stand on the legs.
- Cut out the babe in swaddling clothes, and place him in the manger. You may want to put some lining in the manger (e.g. Easter grass) to simulate hay.
- With all pieces complete, arrange them in a manner that is pleasing to you. You may want Joseph to be holding a staff. If so, you can make one from cardboard or two thicknesses of paper; or you can go outside and find an appropriate sized twig. You can then glue the staff to his hand.


